PRODUCT

3 Steps to Prepare a Hard Copy Electronic Bundle (ebundle) - Training Tip

Did you know you can effortlessly create a hard copy paper bundle from any ebundle created in Bundledocs? In our latest #trainingtip post we will highlight just how this can be done. 

Whether you produce paper bundles or produce electronic e-bundles, Bundledocs is the solution for you. Our unique solution simplifies and streamlines the process of preparing bundles through the automation of time consuming tasks. What does that mean for you? For legal professionals it means you no longer have to spend countless hours preparing bundles - creating indexes, numbering and paginating bundles, collating and much more. With Bundledocs this is all a thing of the past. 

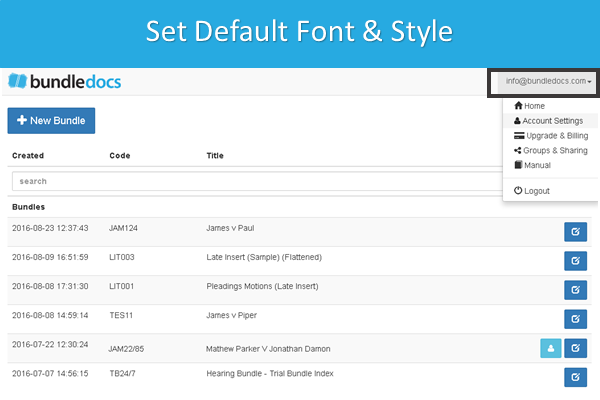
How can I create a hard copy of my electronic bundle with Bundledocs?

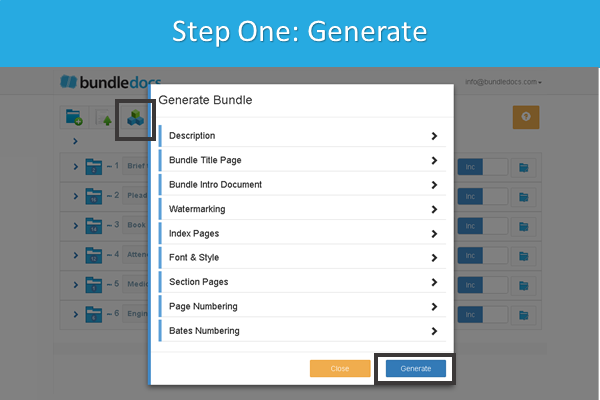
Step One - Generate: When you are ready to produce your bundle, hit the generate button. This will merge all your documents into a single PDF bundle, automatically create an index page, number your entire bundle and apply any customization's you have applied. (Did we mention it automatically hyperlinks and bookmarks your bundle too!)

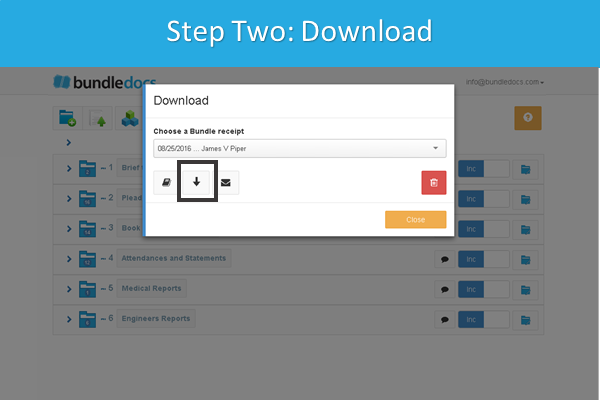
Step Two - Download: That's it! Your bundle is immediately available to download. 

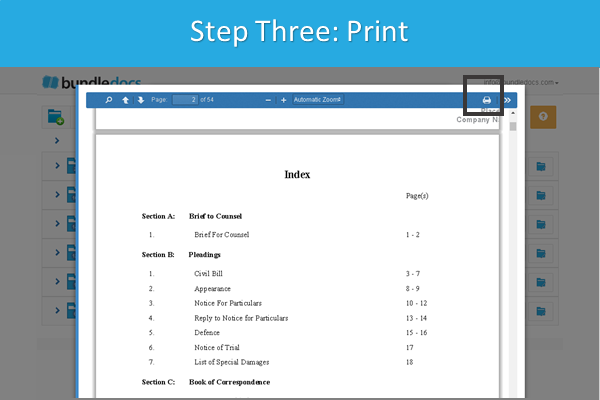
Step Three - Print: You can download your PDF electronic ebundle directly to your computer, laptop, tablet or smartphone. Need to create a paper hard copy bundle? No problem. Simply select 'Print'. It really is that simple. 

Interested to learn more? Get in touch with our team today! We will be happy to give you a FREE online demonstration of Bundledocs. Alternatively, you can create a FREE 30 Day Trial right now. 

Start your FREE Trial Today!

How can I remove Draft from my Bundle? - Training Tip

In our latest #trainingtip post we will take a look at how to use and apply watermarks to your bundle in Bundledocs. Let's take a closer look at how this works...


I have generated a bundle but the word ‘Draft’ appears on my bundle. How can I remove this?
— Free Trial User

Bundledocs powerful bundling solution offers you a range of options to customize bundles to suit your requirements. One of the most commonly used options is the ability to apply a watermark to your completed bundle. 

When it comes to applying a watermark to your bundle you can choose to apply commonly used options such as 'draft' or 'copy'. Alternatively, you can simply type a watermark you would like to use or even upload a custom watermark image. 

If you have previously applied a watermark and now would like to remove this watermark, this can be easily done by following these simple steps: 

1. Generate: Select 'Generate'. 

2. Watermarking: You can expand the 'Watermark' section - all you need to do is select that '+' icon. 

3. Apply Watermark?: To remove a watermark you have previously applied, simply deselect the 'Apply Watermark' button. 

That's it! Simply generate a new version of your bundle and the watermarking will no longer appear. What's great about Bundledocs is you can easily re-apply your watermark at another time if needed. 

Interested to learn more? Make sure to download a copy of our User Manual directly within your account (this covers everything there is to know about Bundledocs). If you have a question or query then get in touch with our dedicated support team today!

Download our Manual for FREE!

How to Set Default Font and Styles in Bundledocs - Training Tip

If you are regular reader of our blog, you may be aware that we recently announced the introduction of our new Font and Styles feature. This is a great new release as it allows you to customize your bundle even further. 

This week we highlighted how to apply font and styles to your bundle. That's not all. Our latest release also allows you to set a default font and styles for your index pages, section and page numbering. This will ensure that every bundle created in Bundledocs will utilize these settings. 

How can you set default font and styles for your bundle?

1. Select your email in the top right corner. 

2. From the drop-down select 'Account Settings'. 

3. Within the 'Font & Style' section you have the ability to customize how you would like your bundle to appear. 

4. Press 'Update' to save any changes made.  

Interested to learn more? Make sure to download a copy of our manual to find out everything there is to know about Bundledocs and get up to speed fast.

Try for Free

How to Apply Font & Styles to your Bundle with Bundledocs

Recently we announced the introduction of our new Font & Styles feature which will allow all Bundledocs users to customise their bundle even further. In today's post we will take a look and see how it works.  

  1. Select 'Generate'. 

  2. Within the 'Font & Style' section you have the ability to customize how you would like your bundle to appear. 

  3. To complete simply press 'Generate'. 


Our new Font & Styles feature allows you to specify the look of your index pages, sections and page numbering used in your completed bundle. This is great for those that work with 'house styles' or have specific font styles they would like applied to their completed bundle. 

That's not all. Bundledocs also offers the ability for you to set default font and styles for your account.  We will cover this in our next blog post so make sure to follow us on Twitter, Facebook and LinkedIn to keep up-to-date with the latest. 

Can't wait until then? Our updated manuals are live and are free to download now

Try for Free Today!

Bundledocs Court Bundling Solution Launch New Features - Annoucement

At Bundledocs we are committed to ensuring we offer the most comprehensive bundling solution on the market today. We know that busy legal professionals do not have the time to allocate to long training sessions or read through copious amounts of training materials. That's where Bundledocs comes in. 

Working in the legal world for over 14 years, we know that is it imperative that our solution is simple and intuitive to use but also powerful to ensure that every bundle produced is prepared precisely, is of high quality and can be provided to the court in good time. 

When it comes to producing your bundle, we know that depending on the type of bundle you are producing you may have different requirements. From working with our clients we became aware that some of you would like the option to apply your own font/styles to your bundle. You asked. We listened. 

We are delighted to announce the introduction of our new Fonts & Styles feature. Our latest release allows you to specify the look of your index pages, sections and page numbering used in your completed bundle. 

Want to learn more? We will be highlighting our latest release over the next few days so make sure to follow us on Twitter, Facebook and LinkedIn to keep up to date with the latest.  

Can't wait until then? Our updated manuals are live and are free to download now.

Register for a 30 Day Free Trial